






Categories List
Recent Posts
Open Box Connectors in Guardrail Installations: Fit-Up Checks That Prevent Failures
In guardrail installations, an Open Box Connector may look like a simple component, but correct fit-up is essential to system performance and roadside safety.
Operators and installers should verify alignment, bolt-hole accuracy, contact surfaces, coating condition, and connection tightness before final assembly to avoid preventable field failures.
The central judgment is straightforward: if an Open Box Connector does not seat correctly before tightening, additional torque will not solve the underlying installation problem.
For field crews, the highest priorities are avoiding forced assembly, identifying dimensional conflicts early, protecting galvanized surfaces, and documenting nonconforming parts before work continues.
This guide focuses on practical checks that prevent loose joints, uneven load transfer, premature corrosion, damaged hardware, and costly rework after the guardrail system is installed.
Why Fit-Up Matters Before Bolts Are Tightened
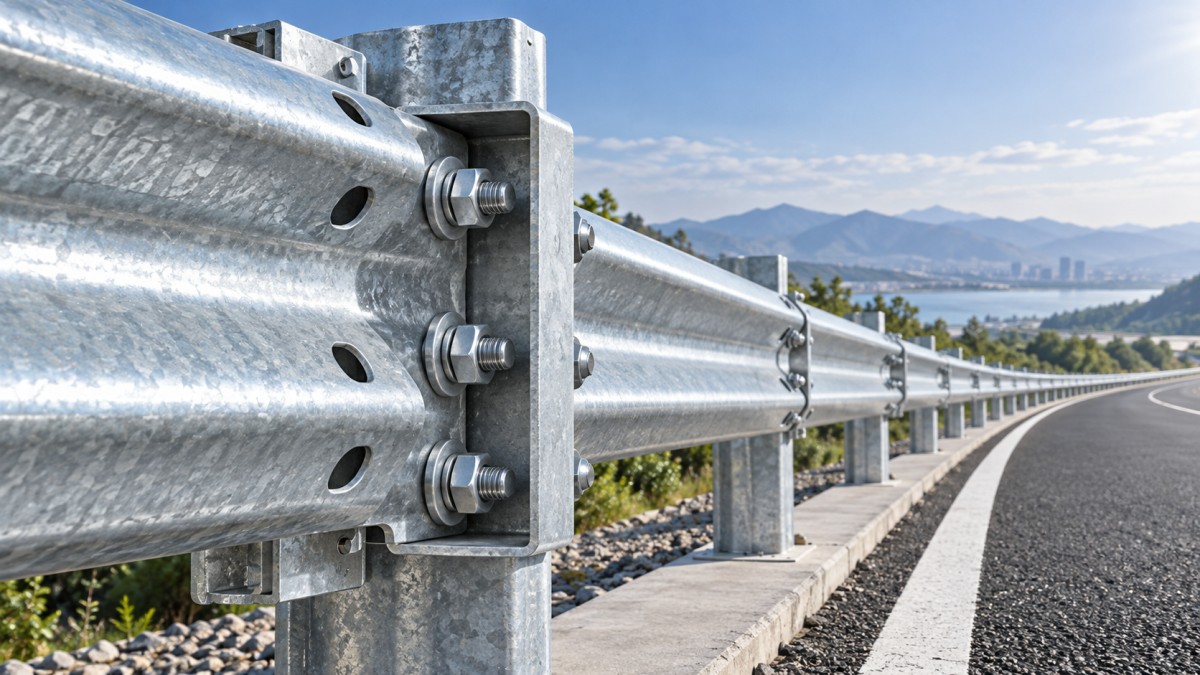
An Open Box Connector transfers loads between guardrail components, posts, beams, or terminal sections. Its position affects how collision forces move through the complete installation.
When a connector is offset, twisted, or poorly seated, the system may develop unintended stress concentrations during impact. These stresses can reduce predictable guardrail behavior.
Improper fit-up can also create visible problems before a vehicle ever contacts the barrier. Uneven rail lines, elongated holes, bent bolts, and coating damage are warning signs.
Operators should treat fit-up as a verification stage, not merely a preparation step. The connector must match the designed geometry before any final fastening sequence begins.
A joint that requires heavy prying, hammering, or bolt forcing should be stopped and reviewed. Excessive force often masks incorrect part orientation or site alignment issues.
Correct assembly helps the barrier absorb impact energy, redirect vehicles toward their normal path, and maintain intended continuity across highways and hazardous road sections.
Start With Part Identification and Orientation
Before lifting components into position, confirm the connector type, drawing reference, finish requirement, bolt specification, and installation orientation against the approved project documents.
Open Box Connectors can appear similar while having different hole spacing, flange dimensions, material thicknesses, or left-hand and right-hand configurations. Visual similarity is not sufficient.
Check part markings, packing labels, fabrication records, and shop drawings. If markings are missing or unclear, isolate the component until its identity is verified.
Orientation mistakes commonly occur when installers rotate a connector 180 degrees or install a mirrored part. This can place bolt holes slightly out of position.
Compare the connector’s open side, flange direction, drainage features, and hole pattern with the rail layout. Do this before workers begin adding bolts.
Where project drawings specify a particular connection sequence, follow that sequence. Installation order can affect access, alignment, and the ability to inspect contact surfaces.
Check Rail and Post Alignment Before Connecting
Most connector problems originate from surrounding components rather than the connector itself. Verify rail elevation, post spacing, post plumbness, and beam alignment before fit-up.
Use a string line, straightedge, level, laser, or approved site measurement method to identify visible deviations. Select the method appropriate for project tolerances.
A rail end that droops, rises, or twists can pull the connector out of plane. Tightening bolts against this condition may lock distortion into the joint.
Confirm that posts have not shifted during driving, excavation, backfilling, or concrete placement. A small post movement can affect multiple downstream connections.
Check whether the rail overlaps, laps, or interfaces with adjacent elements as designed. Incorrect overlap direction can interfere with both connector seating and impact performance.
Do not use the connector to pull misaligned beams into place. Correct the supporting geometry first, then repeat the fit-up check with parts resting naturally.
Verify Bolt-Hole Accuracy Without Enlarging Holes
With parts held in their intended position, inspect each bolt hole for concentric alignment. Bolts should pass through without excessive side loading, cross-threading, or forced insertion.
Start by placing several bolts loosely in opposite locations. This confirms overall alignment and prevents one early bolt from misleading the crew about actual fit.
If holes do not align, identify the cause before drilling, slotting, or reaming. Unauthorized modifications can weaken components and invalidate project or safety requirements.
Common causes include incorrect connector orientation, mismatched rail sections, displaced posts, fabrication variation, debris between surfaces, or an incorrect bolt diameter.
Inspect bolts, nuts, and washers for correct grade, length, thread condition, and coating. A bolt that is too short may not achieve proper thread engagement.
Bolts must be installed according to the approved drawing and specification. Washer placement, head location, and nut position can be important to clearance and load distribution.
Inspect Contact Surfaces and Galvanized Coatings
Before assembly, examine all mating surfaces for mud, gravel, packing material, weld spatter, moisture pockets, burrs, or damaged galvanizing that prevents full contact.
Clean surfaces with approved methods that do not remove protective coatings unnecessarily. Do not leave abrasive debris trapped between the connector and adjacent steel.
Gaps between mating surfaces can allow movement under traffic vibration or impact loading. They can also collect water and accelerate corrosion in concealed areas.
Inspect hot-dip galvanized surfaces for scratches, bare steel, flaking, white corrosion, or handling damage. Record the condition before covering affected areas with hardware.
Where repair procedures are permitted, use the approved coating repair method and verify coverage. Field touch-up should restore protection without interfering with joint seating.
For installations exposed to deicing salts, coastal moisture, or frequent runoff, coating protection deserves additional attention because concealed corrosion may remain unnoticed for years.
Tighten Connections in a Controlled Sequence
Once the Open Box Connector is correctly seated and all bolts are inserted, tighten fasteners gradually in a balanced pattern rather than fully tightening one side first.
A controlled sequence helps maintain alignment while bringing surfaces into contact. It also reduces the risk of twisting the connector or placing uneven load on hardware.
Use calibrated torque tools when torque values are specified. Do not estimate final tightening by feel, especially where crews use different tools or shifts.
Follow the governing project specification for torque, turn-of-nut, locking hardware, or other fastening requirements. Local rules may differ from general installation habits.
After tightening, confirm that no bolt has bottomed out, bent, stripped, or lost washer contact. Inspect accessible threads for the required engagement length.
Mark completed fasteners where site procedures require it. Clear visual marking helps supervisors distinguish inspected joints from connections that still need final verification.
Use a Final Inspection That Focuses on Failure Risks
Final inspection should confirm more than the presence of bolts. It should evaluate whether the completed connection matches the intended design position and load path.
Review rail continuity, connector seating, bolt orientation, fastener tightness, coating condition, and clearance from nearby objects. Inspect both visible and less accessible faces.
Look for uneven gaps, distorted flanges, missing washers, damaged threads, unauthorized drilled holes, and connectors bearing against unintended edges. Each can indicate a compromised joint.
Photograph nonconforming conditions before correction when project quality procedures require records. Good documentation supports traceability and helps prevent repeated installation errors on later sections.
For durable highway systems, component quality and installation quality must work together. A properly manufactured connector cannot compensate for incorrect field fit-up.
Products such as Norway Guardrail are designed for reliable impact resistance and long-term corrosion protection, but their performance still depends on accurate connections.
Its wave-shaped design and hot-dip galvanized coating support demanding highway applications, including hazardous road sections where consistent barrier behavior is especially important.
When to Stop Work and Escalate the Issue
Stop installation and notify the responsible supervisor when connectors cannot seat naturally, holes require modification, coatings are severely damaged, or structural parts appear distorted.
Escalation is also appropriate when field dimensions differ from drawings, rail elevations vary unexpectedly, or supplied components do not match approved identification records.
Do not correct dimensional issues by heating, cutting, welding, or bending components unless written engineering approval specifically authorizes the method and documents the resulting condition.
Early escalation usually costs less than correcting a completed guardrail run. It also protects operators from being asked to accept unsafe workarounds under schedule pressure.
A concise field report should identify the location, component markings, measurements, photographs, observed condition, and temporary action taken to protect the work area.
Conclusion: Fit-Up Is a Safety Check, Not a Formality
An Open Box Connector performs reliably only when it is correctly identified, aligned, fully seated, properly fastened, and protected from corrosion at the time of installation.
Operators should never rely on bolt force to overcome poor geometry. Correcting alignment, hole mismatch, surface contamination, or coating damage before tightening prevents later failures.
The most effective routine is simple: inspect surrounding alignment, test bolt-hole fit, clean contact surfaces, tighten in sequence, and document any condition outside approved tolerances.
By treating fit-up as a critical safety control, installation teams can reduce rework, protect barrier performance, and deliver guardrail connections that remain dependable throughout their service life.
Leave A Reply
Need More Details?
Contact me for details on creating and managing design projects, project features, and services and prices
consult
Our company was established in 1998. It‘s a Chinese pioneer enterprise integrating production and sales, committed to providing high-quality steel products to customers at home and abroad.

First class quality service and professional after-sales team.
Get in Touch
*We respect your confidentiality and all information are protected.